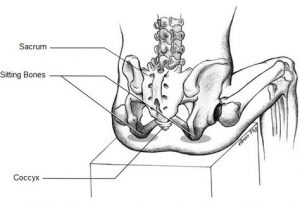
In our last post we examined the Upper Crossed Syndrome: Tight chest and back of the neck and weak upper back and front of the neck. The Lower Crossed Syndrome which we will examine in this article goes hand in hand with the Upper Crossed Syndrome. When our upper body is out of whack, the lower body is going to have to compensate and vice versa. When we give into gravity and hang down and forward our pelvis will tilt. In a seated position, typically the pelvis rolls under, flattening the lumbar curve and creating a very weak, compromised position in the lower back. And when standing the pelvis usually tilts forward creating gripping in the lower back and a letting go of the abdominals. In either scenario this causes us to lose the optimal height of our spine and the upper body collapses. This puts a great deal of pressure on the muscles of the lower back and tension into the front of the hips ( hip flexors).
In the Lower Crossed Syndrome the gluteals and abdominals are weak and the lower back and hip flexors are tight. Below are some release sequences for you to practice everyday to slowly start to organize and balance your connective tissue. Remember to only stay in one spot no more than a minute and a half. Hold pinpointed pressure or add a very small rocking or flossing action on the ball.
1. Side Hip Release
You need a mat, 2 pillows ( one for under the head and one for between the legs) and a regular sized tennis ball. Side lie on the mat and place the pillows. Place the ball under the bottom hip at the side seam of the pant in the meat and not on a bone. You are looking for a spot of intense sensation. After 2 or 3 breath cycles the spot should soften and you should feel as if you can absorb the ball into the pelvis. Add the flossing motion. Before moving to the opposite side, turn onto the back and sense the difference between the 2 sides.
2. Front of the Hip Release
You will need a mat and 2 regular sized tennis balls. Lie on your belly and place a ball under each hip crease. Fold the hands with the elbows out to the sides and place the forehead on the hands.Take a few inhales and exhales to land on the balls ( get heavy). Staying heavy on the balls throughout start to add a small tilt of the pelvis. Inhale and send the tail to the ceiling. Exhale and send the tail between the legs. As you go back and forth start to pay attention to the upper body and keeping it heavy. After 10 to 20 reps of the slow rocking take the balls out, lie on the belly and sense the difference. Sit back into child’s pose and breath into the back of the body while allowing the head to rest on the floor.
Click HERE to schedule with this instructor.
Click HERE to take classes with this instructor.


